7/21/2012

DVD to Apple TV Converter – Rip DVD to Apple TV in 3 Steps


Got an Apple TV at home? Want to put your DVD movie on your Apple TV for high resolution viewing? Well, you’d better get a DVD to Apple TV converter to help you. This article is going to show you the easiest, fastest speed, high quality solution.
Enjoying DVD movies with family would be pleasant. But, as we know, the Apple TV only supports to play MP4 and MOV format videos, so you need to transfer the movie to Apple TV compatible format. CloneDVD is a powerful and easy-to-use DVD to Apple TV converter which can convert DVD video to Apple TV MP4 and rip DVD audio Apple TV MP3 with excellent quality.
Guide on How to Rip DVD to Apple TV
Step 1. Run the converter and insert the DVD disc you want to convert. Cancel auto play. After a second you will view all the information of the disc on the interface.
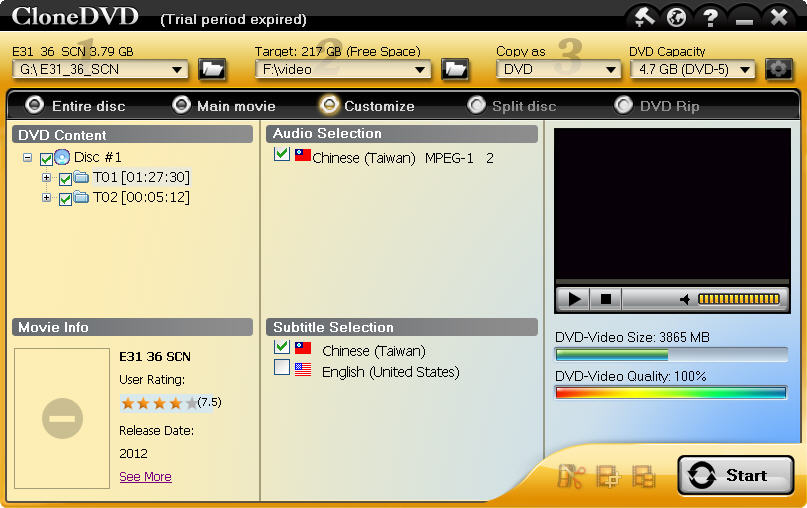
insert the disc
Step 2. You can choose the optimized output format for Apple TV. Go to Copy as “Movie File – > Apple TV – > Apple TV (512×384) High Quality (*.mp4)”. You can also set an output folder to save file, if you don’t want use the default one.
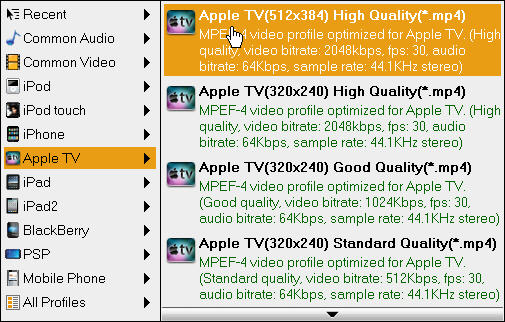
choose apple tv
Step 3. Choose a copy mode and start to rip. For ripping DVD, there are 4 modes for you options: Entire disc, Main movie, Customize, DVD Rip. Choose a desired one and begin to rip DVD to Apple TV by hitting the big button “Start”.
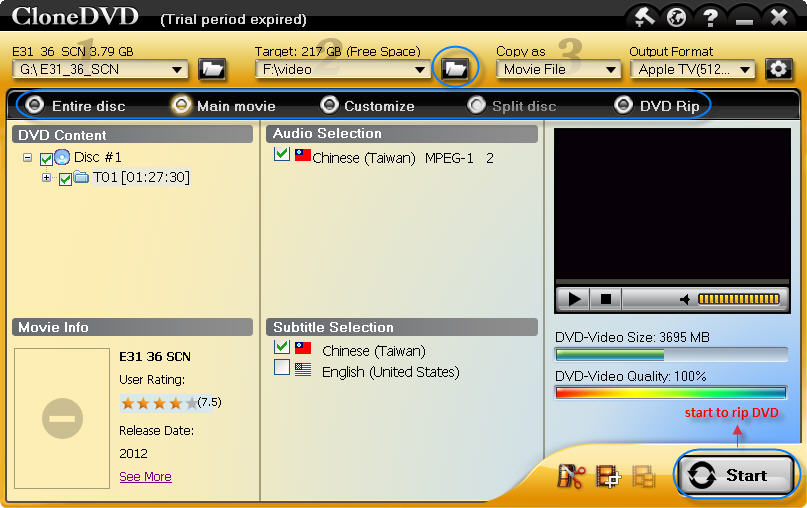
start to rip dvd to apple tv
After the ripping process finishes, you can transfer the file to Apple TV and enjoy it freely. This DVD to Apple TV converter can not only convert DVD to Apple TV, but also convert DVD to a lot of devices like iPhone, iPod, PSP, iPad, etc.
7/18/2012

How to Rip DVD to Xvid AVI with Subtitles?


Xvid gets more and more popular, especially after DivX became commercial. It is not only as good as DivX, but even better than DivX since it has been improved several times. Ripping DVD to Xvid AVI is quite easy if you have the right tool. You will first need to download a DVD decrypter which decrypts CSS, removes all protection schemes to rip DVD to Xvid, keeping DVD high quality. So that you can enjoy DVD movies in Xvid portable player like Creative Zen.
DVD to Xvid Ripper like CloneDVD produces DVD movies with high video/audio quality and small size. Selection of audio track and subtitle language, customization of output video resolution and titles are available.
Instructions
rip dvd to xvid
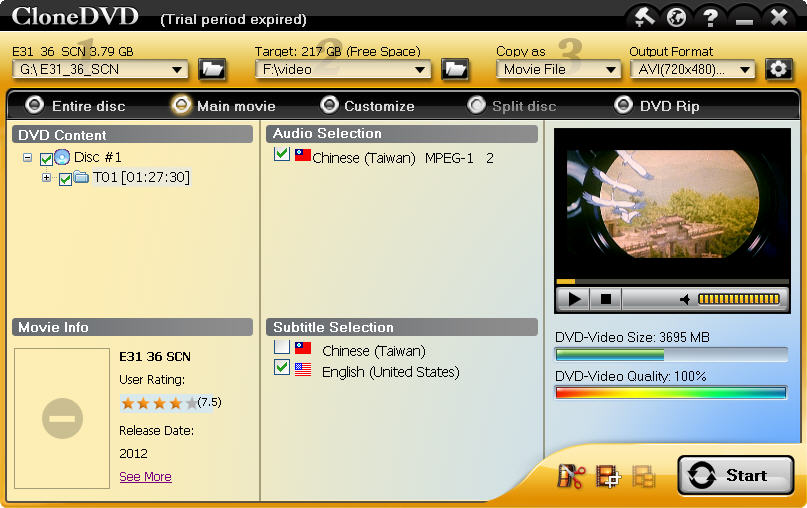
Step 1. Launch the DVD to Xvid ripper and insert the disk into the drive. The program will auto load the disc.
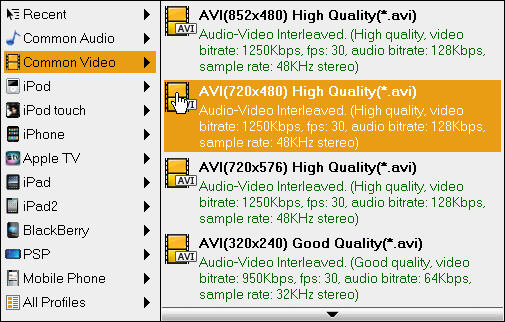
Step 2. Choose copy as movie file, go to Common Video and choose a desired AVI format according to your device resolution.
choose xvid avi
Step 3. Choose a copy mode and output folder. Ripping a DVD, there are 4 modes for your choice: Entire disc, Main movie, Customize, DVD Rip. Choose a target folder where you want to save to converted Xvid AVI file.
Step 4. Select the audio track and subtitle language.
Step 5. Edit movie. Click edit movie to add watermark or crop the black bars.
Step 6. Start the DVD to Xvid conversion. Click start to rip dvd to xvid to start ripping DVD to Xvid.

7/13/2012

Recovering my deleted files from my computer


Hello friends, I am Reyan from Florida, I am here to express my thanks to someone who saved my life. Well this is not very old story, I was getting ready to summer vacation and all was done. We have been waiting for our schools to officially announce vacations after current internal exams. I am a good student and always keep a place in good-book of my teachers. I worked hard to make sure all the assignments given to me are ready and set to go.
It was due to be represented in our school on 12th and on 10th night, I found something that can not be told in words. I found that entire school folder is missing from desktop. I could not believe that. How it is possible, I checked recycle bin and nothing, recycle bin is empty.
What to do now? I thought, “Is it possible to recover deleted files?” I don’t want to call a friend and ask for help, they might think, “I am just fooling them”.
I used google and found software called “Acebyte”, this software was claiming to recover deleted files and folders from computer. And good thing was “it was free to test in full working mode”.
I had to try now, and I did the same. I downloaded and installed this utility for recovering deleted files. I found a button for “undelete”, clicked on that, and a new window which says “help you restore deleted files after you have emptied the recycle bin”. YES, this is the one, I was looking for. Local disk “C” was selected and I knew my desktop is in C drive.
I clicked on scan and it started showing all, O MY GOD, it really works. I can search on a specific file type; I can re-search and filter files I wanted. I never thought restoring deleted files would be so easy. Acebyte worth and I am here to say thanks to them.
They offer many more options you will need in your day to day life; you can use Acebyte to keep your computer clean and fast like new one. And it is reasonably priced, less than $20. I am using a paid version and I recommend to all my friends.